Implementing a Web Push Notification System with Subscribers, Gatsby JS and Netlify
 Alfredo Juarez | August 20, 2019

Web Push notifications are content messages that are sent to a device by a web application or website. These Web Push notifications can only be sent to site visitors who have opted-in to receive such notifications from a particular website or web application. This opt-in for Web Push notifications usually occurs by a visitor visiting a site and being presented with a Web Push notification that asks if that visitor would like to receive updates from that website. If a user accepts or says yes, then that visitor subscribes to these updates.
On this tutorial, I am just going to show how to implement a web push notifications system using Subscribers and a Gatsby JS site. If you are interested in knowing more about Web Push Notifications and how you can leverage its full power, I recommend you this awesome guide that covers pretty much everything about it.
Preparing our app
The very first step is to set up our app. This one is built with Gatsby JS to create a React app: gatsby new project-name https://github.com/alfrekjv/gatsby-starter-blank
cd project-name
git init
git remote add origin github-repo-url
git add .
git commit -m "gatsby starter pack installed"
git push -u origin master
Here are a few things to consider:
- You must create a Git repository in order to use Netlify
- Replace project-name with the name you want to use for your website.
- If you don’t have node, npm and/or gatsby installed, you might want to do it first.
Adding Subscribers support
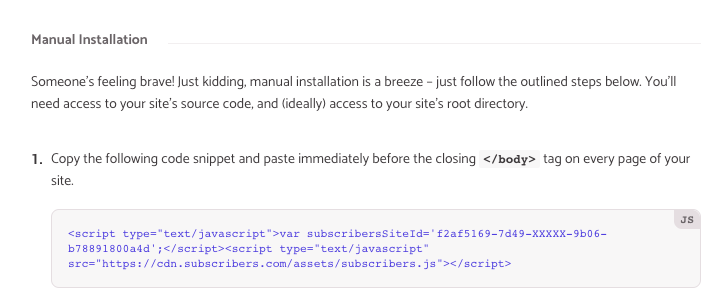
If you don’t have an account yet, just go ahead and create one and then get the subscribersSiteId on the install code section. Now, in order to add Subscribers’s support, we must use a Gatsby plugin (everything is plugin in Gatsby)
yarn add gatsby-plugin-subscribers
Next step would be to configure our newest plugin. For that, we need to edit the gatsby-config.js file.
plugins: [
  {
    // Note: this plugin is coded to only work on production
    resolve: `gatsby-plugin-subscribers`,
    options: {
      id: 'your subscribersSiteId goes here',
    }
  }
]
Important note: Subscribers also recommends to install a service worker, for that, you’ll just need to create a folder called /static at the root of your project and put the file there.
Deploying Site on Netlify
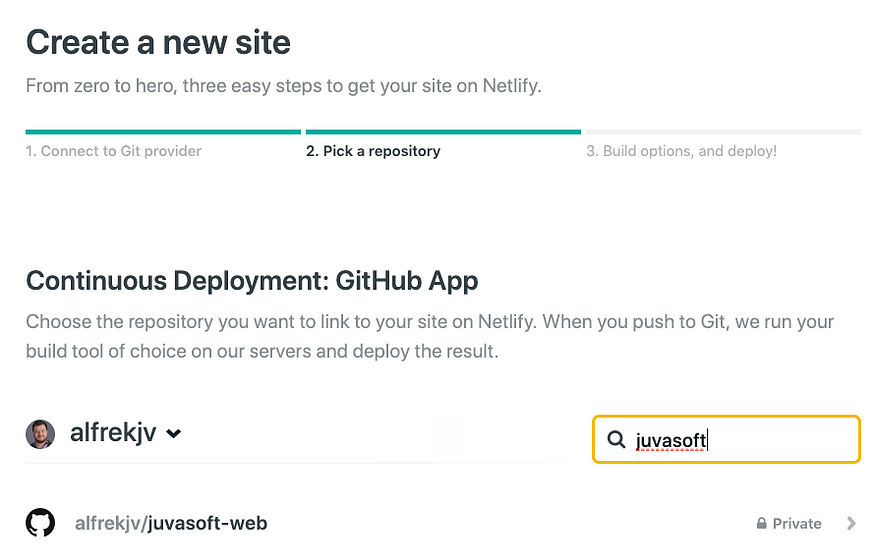
To deploy our website to Netlify, we just need to login / or create an account and click the New Site from Git button. Then, find your git repository and select it. After selecting the repository, you’ll have to set up the deploy settings which will go as follows:
Build command: gatsby build
Publish Directory: public/
That’s it! Every time you push to master on your website’s repo, Netlify automatically will deploy your site with the newest code.
Netlify assigns you a temp URL, which goes something around https://yourwebsite.netlify.com which you can use to test the site you just created or you can add a custom domain if you need it.
Alright, so, now that we’ve added Subscriber’s support and deployed the website to Netlify, next step would be to start sending Push Notifications campaigns to your subscribers.
With such a low barrier to entry, you can see how you can make really dynamic experiences with JAMstack applications. It’s amazing how much you can accomplish without any maintenance costs from servers.
Let's build something great
Need help with rapid prototyping, UX design, app development, or digital product strategy? Please fill out the form below for a free consultation. All fields required.